Wednesday, May 30, 2012

Heat Lamp + Coop


At about 12:30am on the first night the chicks were in the coop, I checked the temp and it was about 48deg.  I know I know... they are just birds but I just couldn't let them be outside at that temp yet.  So I was a paranoid parent, and quickly set the heat lamp in the coop.  I will leave the nice heat bulb in there for a couple days, then move to another bulb for a few more days then take the heat lamp all together.  I think that will be good transition for the girls.

Sunday, May 27, 2012

7 weeks old


Mermaid, Belle and Princess Aurora Sleeping Beauty - 7 weeks old

The chickens are now 7 weeks old.  I spend a lot of time looking online to find out at what age is ok to put the chicks outside.  The chicks feathers have come in and I have been letting them spent a lot of time outside this past week plus the weather is suppose to be pretty nice this week, so I decided it should be ok to put them in the coop.  My wife is happy to get them out of the house and I think the chicks will like having a bit more space then the box they have been living in.  I added 1/2 fresh new wood shavings and then I added their current wood shavings hoping the smell and familiarity will make the coop feel comfortable.  I also am using their small water bottle and feeder until I get the run completed. Once the run is completed, the coop will be free of food and water.  While I am a little worried about the chicks being outside at night, I am excited to have the coop done ahead of schedule.

I also put a screwed the chicken door shut until the run is finished.


The chicks checking out their new home

Mermaid, Princess Aurora and camera shy Belle checking out their new coop

Chicken Coop - Done!

Finished chicken coop
After recently getting the roof completed, painting main part of the coop white and caulking the coop, I was able to finish the coop today!!!  I am happy because I wanted to have it done at 8weeks and I beat that by about a week. I also completed the coop for about $100 and 15 hours of time.  The only materials I really needed to buy was 1 can of white paint, hinges/latch hardware and a variety of wood. Siding, caulk, screws, posts, acrylic, whiteboard wood are all materials left over from other projects.

I added a natural branch for a roost and covered up the nesting box access
I used 2 screws to put a piece of wood over the nesting boxes to keep the chicks out until they are closer to 20 weeks.

Chicken coop with main access door opened 

Main access door and nesting box with latches

I got a handle and lock added to the main access door and a handle and latch on the nesting box.  To be honest with you, I added the latches for predators but my real worry is not from animals, I am more nervous about the dumb ass drunk college neighbor kids jumping our fence and messing with the chickens...

Ventilation window and roof

Chicken door opened and ramp allowing chicken access to the run


Saturday, May 26, 2012

Child labor


I had some help painting the coop this afternoon! My little girl got to help me "color" the coop and the 2"x4"s for the run.  For being 2 1/2 years old, she did a great job and it supports my feeling about why I am doing this for my family...  :)

Coop - Day 3 Afterwork work

Coop with door with out window
I had a a little bit of time this week in the evening after work to put some time into the coop.  I was able to get the door built, then I realized I needed a window.  So, I came back another evening and cut a window into the door, put shingles on the roof and caulked the coop.
I had a small strip of acrylic from a shelf project more then 10 years ago laying around so I used it to make the window.  I needed something that let me quickly look into the coop but I am a little worried that about the lack of ventilation on this side.  It will be nice in the winter, but I hope it doesn't get too hot in there in the summer with only 1 ventilation window.

I also made a litter fence inside the coop.  This piece of wood is removable and with the smooth finished laminate flooring, cleaning and sweeping out of the bottom of the coop should go pretty quick


My last few steps with the coop is painting it and getting the roof added.  I hope to get that done this weekend so I can start building the run!


Monday, May 21, 2012

Chicken Coop Inspector


The city send out a chicken coop inspector this afternoon.  She seemed a little young for the job but she was very happy and a little sweetheart.  She even tried out the chicken ladder for me!  :)

Coop - Day 2

Coop - Day 2 - 3 sides done and roof cut
After the VW car show on Sunday and got my daughter down for her afternoon nap, I had some time to put into the coop.  I had to purchase some 2"x4"s and some trim wood and my goal was to get all the sides done. I first laid the smooth white laminate board down on the bottom and put the two main walls up. Then I cut the siding pieces.
Chicken door down
Chicken door up
I then started working on the side with the chicken entrance.  I made the entrance 12" wide by 16" tall.  I made it so the door will slide up by a string.  Right now its a tight fit and I hope to sand it down a little so it will slide back via gravity. I will also need to make sure to watch where I paint around the door to keep it from being gunked up with paint.

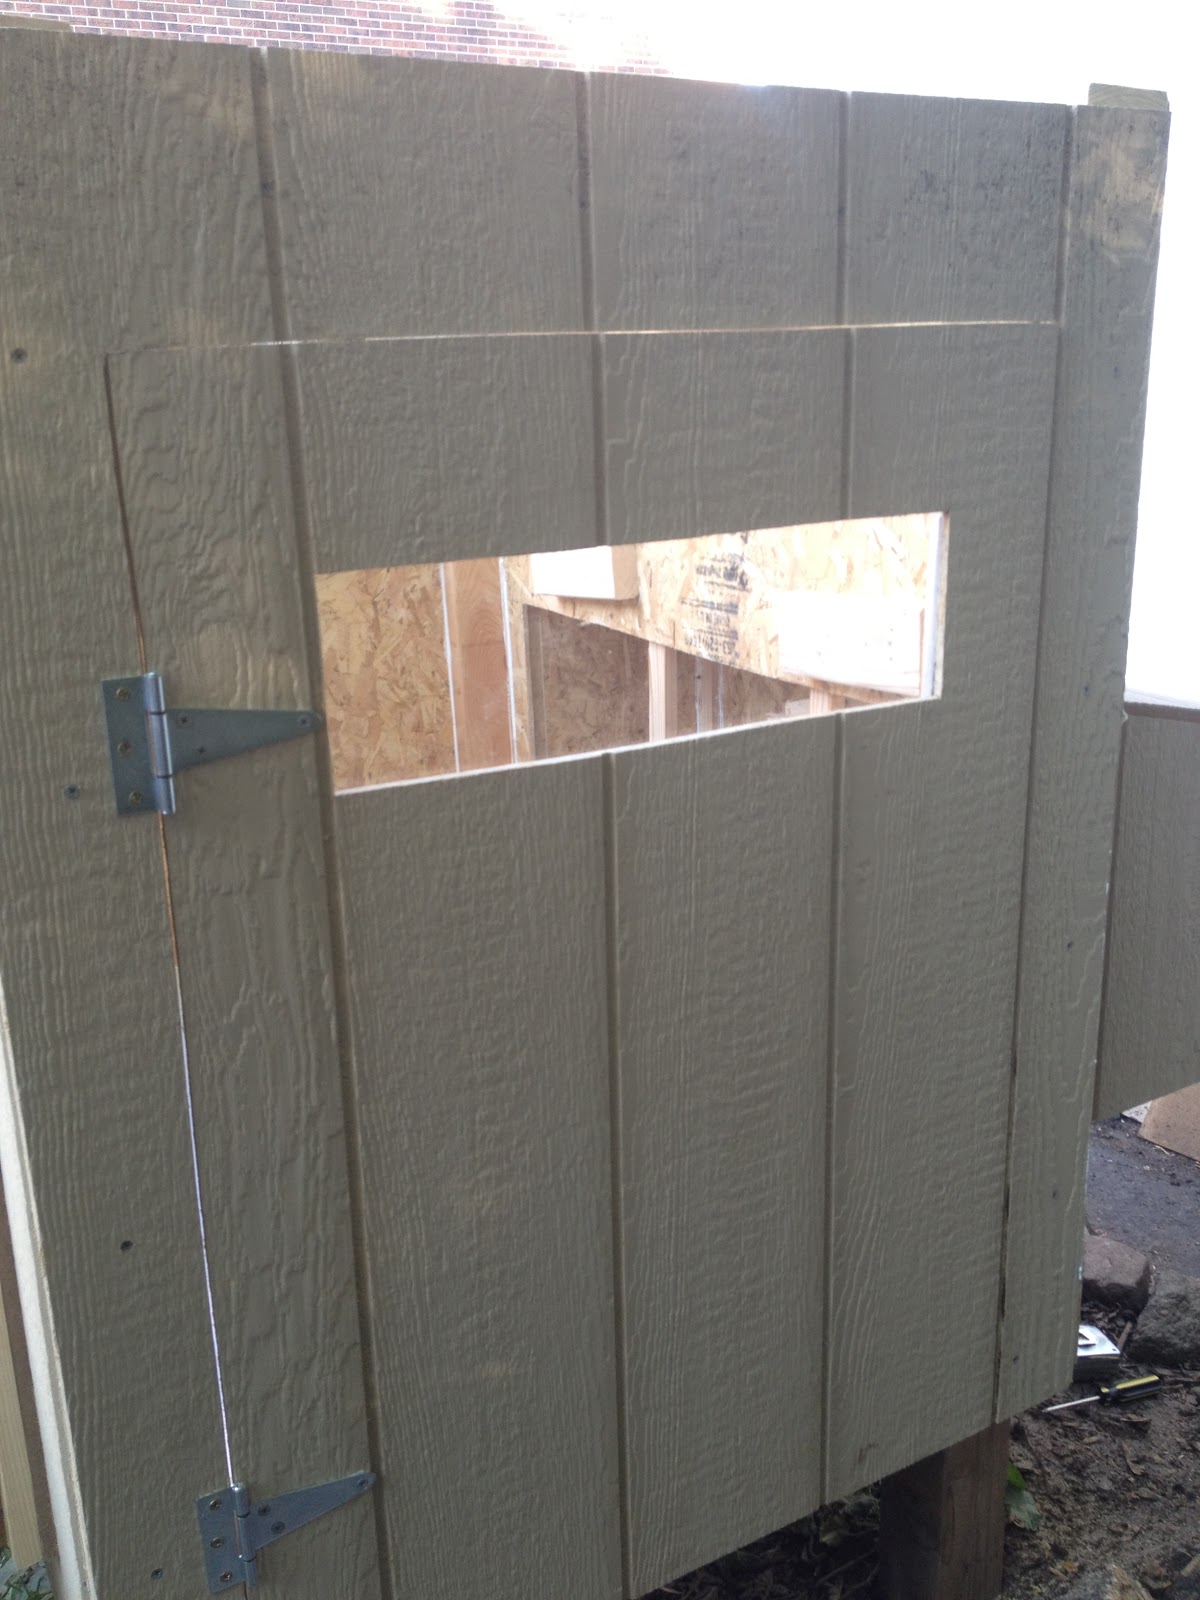
East wall with ventilation window
I then quickly cut the short wall with the ventilation window. It was easy and quick to make.

Nesting boxes and lid
The last more involved wall was the south side with the nesting boxes.  I cut the opening to fit three 14" wide boxes.  I have heard sometimes chickens will all nest in one box but I am hoping each one want their privacy.
three 14" x14" holes to access the nest box
I added the smooth white laminate board to the bottom of the nesting boxes too
A view inside the nest box
A view from inside the coop looking at the nest boxes
The build for nest boxes went pretty well.  I spent a lot of time double checking measurements and finding the right sized scraps.  I got a nice heavy piece of siding for the top and used some hinges to make a top access for eggs.  I need to figure a way out to hold the nest box lid up when gathering eggs.

Overall, I am please with the days work.  I need to make the main access door next, put the shingles on the roof then I think it will be ready for paint.  Its a 3 day weekend with some nice weather so I hope to have the coop done by June 1st.  The next project will be the chicken run which I think will take a little more money, materials time, but thats for another post!  :)


Craigslist Items

I don't enjoy shopping, whether is for clothes or food, but for some reason I can easily get lost in Craigslist.  I have bought and sold lots of stuff on the site and think its a super useful tool on the web.  I look up bikes, cars, electronics and most recently, chickens and coops. I can across these two ads.

Chicken Coop Feeder

Chicken Coop Waterer

I really like these.  I don't necessarily want to go out and refill the chicks feeder and water every day so I like the idea of being able to store a couple pounds of feed and gallons of water. While, the feeder looks incredible easy to build, I think I may buy the waterer from the guy.  I dont know where to source the nipples from and when it comes to getting the chicks water, I don't want make a mistake or build anything that leaks. I also like meeting and supporting Craigslist people.  When working on my VW, I met a guy about 4 years ago and has now become one of my good car buddies. I'll let you know how the purchase goes and how my own feeder tube comes along. 


Chicks take a trip

The weather this past Sunday was finally nice enough that I felt confident the chicks wouldn't get too cold outside. I put up a quick pen for the chicks and took them outside for the first time.  The didn't explore as much as I thought and seemed pretty timid inside the pen.  I would like to keep taking them outside while we are out back for the next couple of weeks while I get the coop and run completed.


Friday, May 18, 2012

Coop - Day 1


I got started on the coop today. I have a bunch of 2"x4"s from a blown over fence, extra shingles from a roofing project, and siding from a shed. So my hope to build the coop with as many reclaimed materials as possible. I went with a 3'x4' base raised 17" off the ground. My hope is the give the chickens some space below for shade and cool. The roof is about 40" tall on the side that I will put the main larger door. On one 4' side near the path, I will put 3 nest boxes, each about 14" wide with flap on top to get the eggs. On the other side there will be a vertical sliding door and ramp for the chickens entrance. I also have some smooth laminate white board material for he bottom of the coop to make clean up easy. 


Thursday, May 17, 2012

6 weeks

The chicks huddling and enjoying a new layer of wood chips. You can really see Belle's bigger size and comb in this photo.  Mermaid is the one on the left and little Princess Aurora Sleeping Beauty is at the bottom buried in the chips.
Where has time gone?  Its seems just like yesterday that we brought our sweet little cute chicks home and the house was filled with a sweet chirp chirp chirp.  The chicks are now 6 weeks old and getting huge!  I REALLY need to get the coop done A.S.A.P.!!  Not only are the chicks out growing their current condo, the wife has had enough of the dust.  I don't know why, but the chicks are VERY dusty animals.  Maybe it is something with the change from fuzz to feathers, but the bathroom they have been living in has literally a measurable layer of dust on everything.  It doesn't bother me, much...
1- I am a guy
2- I am the only one who uses the bathroom for showering and other bathroom duties
3- I know I will be remodeling it in the next year or so.
Regardless, I want this to be a happy experience for everyone in the family so I went to the local HomeDepot tonight and starting buying wood for the coop.  I got as far as cutting the 4 feet of the coop to length and the bottom of the coop cut to 3'x'4. There is a bike race this weekend, a baby shower, a friends daughter's 2nd birthday and a VW car show... so we will see how much really gets done on the coop. Wish me luck!

Belle - 6 Weeks old


Wednesday, May 16, 2012

Rooster?


So, as sweet as the Belle character is in Beauty and The Beast, our chick Belle is definitely more of a beast.  Leading my wife and I to the questions, is she a he?  Is Belle a Beast? Is Belle a ROOSTER?

Now, we have no evidence or proof or talked to anyone who has had chickens and roosters, but we are starting to worry a little.  Belle is a good 20% bigger then Princess Aurora Sleeping Beauty.  Belle is also much more agressive towards the other 2 chicks.  Belle's comb is also a bit bigger.

At this point, I am just going to keep on playing naive and hope the good folks who supplied Golden Mill with our chicks, did a good job of sexing the chicks. I'll let you know if we wake up to a COCKADOODLEDOO one morning!  ;)
Is Belle a Beast?

Tuesday, May 15, 2012

Birds of a feather


A close friend of mine also got chicks this past week!  His chicks are a bit older then mine and he got a Rhode Island Red and a Buff Orrington. Along with his new chicks, he was also able to do a trade for a sweet coop too!  While he lives in Denver, all he had to do was pay $25 to get an animal permit. He was laughing at all the hoops Golden made me jump through.  Oh well,  I am also happy to have another buddy trying chicks out.  His daughters are real excited about the new birds too!

Friday, May 11, 2012

Coops

When I got the chicks, I had 8 weeks to build a coop.  After getting some good bikes rides in and a busy Mothers Day weekend, I have still not started my coop.  I now have about 3 weeks to get one done and I am doing a lot of studying up on the different elements that make up a good coop.  I have a small bit of wood and shingles left over some from some other projects, that I hope to not spend too much money.  Below is some of the good information I have found.


I have been scouring BackyardChickens.com and BuildAChickenCoop.com for different coop designs.

Pre Made - $500 - $1500
http://www.omlet.us/products_services/products_services.php?view=Eglu+Cube

http://handcraftedcoops.com/small-portable-chicken-coop

http://awesomeplayhouses.com/ChickenCoops.aspx

Small Coops
http://www.backyardchickens.com/a/the-misfit-barn-salt-lake-city-ut

http://www.backyardchickens.com/a/sunnychickens-dutch-hen-house-chicken-coop

http://www.backyardchickens.com/a/small-coop-tutorial

http://www.backyardchickens.com/a/bryans-coop

http://www.backyardchickens.com/a/chad76s-chicken-coop

Medium Sized Coops
http://www.backyardchickens.com/a/coloradomikes-colorado-chicken-coop

http://www.backyardchickens.com/a/hennebunkport-coop-design

http://www.backyardchickens.com/a/mikecnorthwests-chicken-coop

http://www.backyardchickens.com/a/my-first-chicken-coop

http://www.backyardchickens.com/a/rancho-chickacabra

http://www.backyardchickens.com/a/two-dog-farm-chicken-coop


Friday, May 4, 2012

4 Weeks old

Its been a month since we got the chicks.  So far, everything has been going pretty well with them. I have had to figure a new way out to give them water.  The waterer worked well when they were young, but after about 2 weeks, they would move so much in the box they would get wood chippings in their water.  I spent more time emptying out the waterer then holding them.  On a tip from an old high school friend, I ended up going to Petco and picking up a small pet water bottle (Thanks E.M.)  The chicks took to it immediately and I haven't had a problem with wood chips since. The only problem with the water bottle is is leaks a tiny bit and the cardboard below the drip gets wet and the chicks nip at it.


Tuesday, May 1, 2012

Comb

Yep, thats what that little flap of weird skin is called just above a chickens beak between their eyes.  At first I didn't understand it, but upon closer inspection it does look like an upside down comb.
Mermaid proudly displaying her young comb.